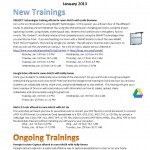
Here are the training sessions upcoming for January 2013.
All sessions are listed in the attached poster with descriptions, times, and locations. Click on the images for details! (Don’t see the images below? Click on the title of this post to view it in its entirety.)
Interested in attending a session? Drop us a line at AL_IS&D@nvcc.edu!


Author Archives: WSDM
Educational Technology and Training for Faculty
When There Is No Photoshop

This month I will be starting my training sessions on Adobe Photoshop, while preparing for it I started to think about one thing. What if somebody can’t get Photoshop?Adobe Photoshop is a pricey tool, even with the Education discount. This led me to think, what solution could I recommend for those that can’t make it to our Sandbox, or get Photoshop?
Google provides a solution called Google+ Photos, which is a part of Google+ that allows you to store, edit, and share photos over the web. The real treat is the ability to do many of the edits that are desired from Photoshop, the only draw back is that there aren’t as many controls.
The way you get there is a bit clunky, but you will get use to it. First you have to setup your Google+ account, without it these tools aren’t accessible. Once there you will see a toolbar on the left hand side, at the top it will have an image and say home, down about half way you will see Photos, clicking on that will change the rest of the window.
Now you will be given some options related to cell phones, but that isn’t what we are here for, so ignore it. Now look up at the top, you will notice that “From phone” is selected, but we want to go to “Albums.” Right now it is empty unless you’ve used Google plus before, so we’re going to click the red button “Upload New Photos” in the top right. A new frame will pop up asking you to drag a photo into it, or you can click the blue button and select them from a file. At the top you will see a category called “Album name:” that you can fill in to organize your photo albums. After that you can drag photos from your folder that you want uploaded and the process of putting your photos online will begin.
Now that you have some pictures to work with select one and it should pop out and be surrounded a dark background. At the top left you will see a button with stars on it called “Edit Photo,” when selected a new window will come up with a ton of options, the list of Basic Edits will allow you to quickly apply color corrections. There are many features here and playing with all the sliders are easy to use and fun, just click and test each option out, or go into the effects tap for some quick and fun solutions. Once you’re done you can click save at the top right and choose to replace or save as a new copy. It is recommended to always save as a new copy just to make sure you have the original on hand.
Well that is how to use Google+ to work on photos if Photoshop isn’t your cup of tea.

